- Introductory components
- Installing the CPU & memory
- Casing & installing the motherboard (aka mobo)
- Graphics, soundcard & add-on cards
- Internal & external media drives installation
- Cabling, PSU, case LED lights & power button
- Additional cabling for output ports
- Finishing touches, power on self test (POST) & BIOS
- Operating system installation (Win XP)
Finishing touches, power on self test (POST) and BIOS
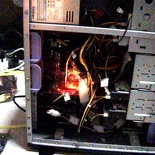
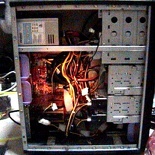
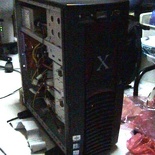
Now to do alittle house keeping before closing up your PC enclosure. Here I will talk about good internal wire placement and layout. It is generally good to keep power cables arranged neat and in order so as it does not obstruct heat dissipation, air flow and operation of moving parts (e.g. fans). As you can see, after assembling the PC, the case is very much like a big Medusa mess of wires.
Though your system can run in this mess and may seem insignificant now, it goes a long way in promoting smoother, cooler internal operation resulting in fewer lockups, lesser equipment failure and longer equipment life. Improper ties cables can get caught in your fan blades, cause necessary noise or vibrations of even create pockets of air spots which built up internal case temperatures over prolonged use.
You can always tidy up the case using cable ties, the general rule is to make all areas where air flow is evident, that is the suction and exhaust areas near the fans. Air generally gets sucked in from the front of the case and blow out at the back, the air flows over your processor and graphic card, which are major heat generators as well as your hard disk, so you do not want any obstacles in the way of this air flow.
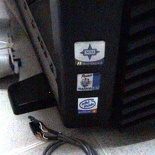
Once done, the following are all cosmetic clean ups, like exterior touch ups are kinda fun thing to do too, first with the pasting of the “all important” intel and motherboard stickers.
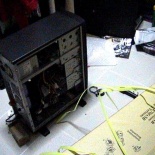
Building your PC can create quite a mess where you are, if tidiness is your cup of tea, you might want to tidy up the area before booting up. Ok with that lets get on with booting up this system.
Now is the magic moment we had been waiting for, making sure your system actually works. Start by plugging in all your required input and output devices, such as monitors, keyboards and mice, ensure they are all powered on and standby. If you have audio, plug in your 3.5mm audio cable and power on your speakers, the same for network with wireless or ethernet cables.
POST
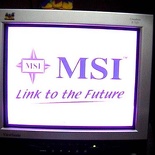
The post (power on self test) is the first thing you see when you first boot up your computer, and that the time when the computer checks for all the connected components, (processor, amount of ram, connected drives.. etc). If you can see the start-up screen and you enter the bio setup, its an indication that everything’s all set right and you can go onto installing your operation system. If everything is ok, the system will just go through all the component checks and eventually stop after the IRQ check or so. The system will continue in this loop until you specify a boot device, which is configurable in the BIOS which I would touch on soon.
What to do if you see nothing on screen
If you do not see anything on-screen after turning the unit on, look for symptoms: Are the fans spining? any harddrive activity? or is your video card not properly inserted? such small tell tale signs can lead you to the problem. Turn off the computer, unplug the main power cable and check that all connections (video, power connectors, add-on cards) are secured and properly plugged in. Do a thorough check on all components and be sure on that. When you are done, close everything backup, plug in power and retry.
If you’ve got everything checked, it is sometimes ideal to reset/clear your CMOS and restart the POST procedure again, it can be done by shorting the CMOS (JBAT1) connector jumpers on your motherboard. (do so when your computer is off and mains power off, or you can get permanent board damage).
As always, consult your motherboard manual if you are in doubt where the clear CMOS jumpers are.
The BIOS
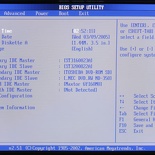
In the BIOS (basic input and output system), you can check the number and type of hard disk, CD-ROM drives you’ve connected, so are the processor info, type and amount of ram you have, this is useful for checking on connections. Included too, are certain diagnostics tools if your board have that feature. You too, can enable of disable certain additional properties such as SMART for hard disks, quick boot feature etc, enable/disable plug and play, on board integrated sound if you intend to use a separate sound card for audio output.
One important thing to do here is to change the boot sequence of your computer if you intend to install an operating system later. If you are using Windows 7, Vista or XP, Linux, FreeBSD, etc, set the first boot device to CD-ROM, for windows 98 and thereafter or alternative, you need a boot up floppy for installation, so select floppy drive as the primary boot drive. Some newer motherboards will auto detect and select a boot device based on what is detected let be installing from a mass storage device or a thumb drive as well, so sometimes it can be done automatically, though you might want to set the option manually and not leave it to chance.
Just explore around, who knows the your BIOS may have some unexpected new features, use the manual as a guide if you do not understand certain technical terms, its always there.
Advanced BIOS tweaking and overclocking
You can fine tune your system by changing certain processor core voltage, graphic card voltage, memory latency for improved performance. If you do not intend to do an overclocking or so, just leave everything as the preset default or normal settings as this is not recommended in the preliminary rounds of setting up your new system. But you can do so after you’ve got the system set up and stable.
With your system up and running, it is now ready to accept the operating system install to get it up into a system which you can actually use.
- Introductory components
- Installing the CPU & memory
- Casing & installing the motherboard (aka mobo)
- Graphics, soundcard & add-on cards
- Internal & external media drives installation
- Cabling, PSU, case LED lights & power button
- Additional cabling for output ports
- Finishing touches, power on self test (POST) & BIOS
- Operating system installation (Win XP)

