
The graphic processing unit (GPU) is very similar to a computer’s CPU only that it is a dedicated processor built to handle the processing of graphic related information with it’s own dedicated RAM, The logic is very similar to having a mini PC strapped inside your PC, thus reducing the load on the main processor itself and improving system performance. Thus leaving the processor to do its more dedicated “system processing” & improving overall performance. This is so since the 1997-1998 era, where the world cries for a new breed of cards- the 3D card to meet increasing gaming & workstation standards. It also marks the boom & birth of the mainstream 3D graphic processor, the tradition still carries on till now with bigger, better & improved cards, as advanced as the CPU.
GPU architecture are getting more complex, not to mention the processing power and speeds they are achieving now with or without in accordance with Moore’s law & are a force not to be reckoned with when it comes to dedicated processing power. This applies the same for other add-on cards such as sound card with their own sound processing chip, esp those found on the Creative Audigy soundcard series, for example.
Though almost all graphic cards come assembled with the embedded processor and attached heatsink, dust and dirt will over time, accumulate on the heatsink and requires cleaning- a chore often overlooked by many. This tutorial aims to teach you how to maintain your GPU in spick and span condition:
- To serve as basic guide for anyone who wish or are intending to do an upgrade & would like to know about the steps involved before carrying out on the process themselves.
- GPU fan upgrade/replacement (for more powerful cooling alternative)
- Application of thermal paste to the GPU (for improved heat dissipation & performance).
Getting to work
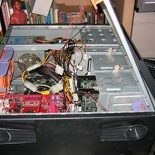
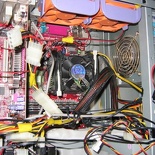
Start by opening your computer up, next, identify the graphic card. If you do not know which card it is, just check which port at the back of your PC connects or fits your monitor cable, usually there will be 2 or more outputs at the back which are either VGA, DVI (Or dual DVI) or Analog S-video outputs. Other than that, it’s usually the biggest card with a large heatsink or fan on it. Other ways of identifying will include it being topmost card on your motherboard expansion slots or the only one screwed at the slot by a lever. Be sure to earth your hands before handling any internal parts of your PC.
Your graphics card have to be of course a dedicated unit to be removed, otherwise you need not do anything if you have integrated graphics on board. Your graphics card can be attached to your computer in many formats, namely, PCI-express or PCI-E for short which comes in the 1.0 or 2.0 formats. Otherwise there is the outdated AGP (accelerated graphics port) format to the old PCI card format.
Removing the card
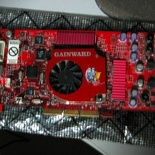
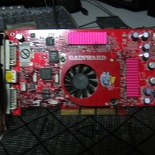
This card here is an AGP card, the way of installing it is rather straightforward and is same for all bus across the board such as the current PCI-E cards. You still get a fool proof slot which goes in only one way.
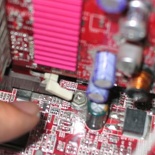
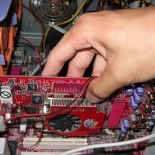
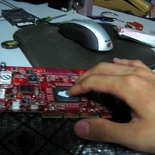
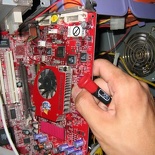
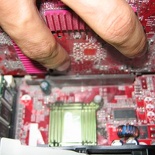
Irregardless of your graphic card slot, the card can only be removed after releasing/unlocking the locking lever found at the end of the port (Fig 2.0). If you card is held by screws, unscrews the card from the case & unplug the card from the slot (Fig 2.1). If your PC case is a tool-less one which uses levers to lock the cards in, check whether there is a dedicated lever per slot or a master one which unlocks all.
Removing the GPU fan
With the card out, note the location of the fan at the center of the card. Note that some cards uses a passive heatsink instead of an active fan, but the process too remove them are all the same, unless your OEM cooler covers your whole card, such cooling units are usually hinged & can be opened in a lid-like manner.
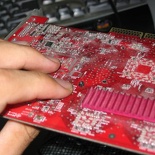
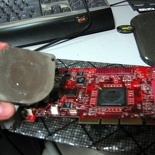
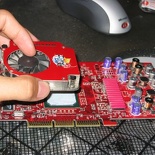
Turn the card over & you should be able to find the plastic securing locks underneath (Fig 3.1). Using a pair of small tweezers of your thumb & index finger, gently squeeze the plastic clip till its small enough to be pulled through out of the board. For most cards there are only 2 of such clips. Unplug the GPU fan from the card (Fig 4.0) & set it aside.
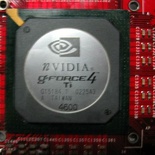
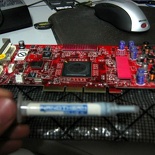
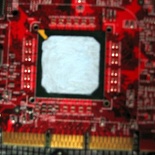
There, you’ve exposed the GPU in all its glory (Fig 4.1). There may be some white paste on it- thermal paste applied from the factory itself. From here you can choose to install a new GPU cooling fan/unit/block (e.g. for water cooling or just want a bigger, more powerful fan for GPU overclocking). Such units usually come secured in the standard similar 2 clip format, which is universal & is the same kind of mounts for the heatsinks or fans on your motherboard North/South bridge too.
Applying thermal paste
Now I will on the process of applying thermal paste to the GPU. It is very similar to applying the paste on the CPU, only that in this case the process and parts are more simplified. Well unless you have a huge custom cooler on your card.
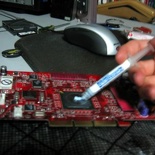
1. Apply a blob of paste onto the GPU (Fig 5.0)
2. Sandwich a clean, dry heatsink onto the GPU (you will get some paste on the cooling unit now)
3. Using a clean finger or one wrapped in plastic, spread the paste as thoroughly & thinly as possible on the cooling unit surface which would come in contact with the GPU.
Now, all thermal paste had all entered the microscopic gaps or crevices of the cooling unit’s metal surface. This is to ensure optimum heat conduction from the GPU to the cooling unit for heat to to dissipated efficient & quickly.
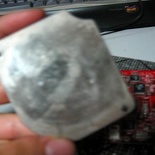
4. Wipe off excess thermal paste from the cooling unit. (Fig 6.0)
5. Next, gently spread the remaining thermal paste you’ve applied on the processor previously. (Fig 6.1)
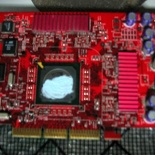
Ensure a nice thin, even spread of thermal paste (Fig 7.0), use a razor or card to excess paste overflowing at the edges. Now we are done with the application.
Replacing the card
Now with the paste applied, it’s time to put everything back together again. Whether it’s your spanking new hardware or simply just putting the old cooler back on, everything is done pretty much in reverse, and is much easier as well.
Place your cooling unit vertically over the GPU with the securing clips & mounting holes in line and slowly lower it onto the board. The cooling unit will clip onto the board easily. Ensure a good lock by momentarily suspending the card from the cooling unit itself, shaking it lightly while suspended will ensure a tight fit and the pins secured.
Now to slot the card back to the motherboard. Installation of the card now can be straight forward as the card can only go in one way. Any problems arise now may be resulted from component damage or improperly connected/unconnected cards.
Slot the card into it’s rightful slot (Fig 9.0) ensuring that the port lever is in the “locked” position (Fig 9.1) once properly seated and secured, plug in your video cables and power up both your monitor and PC, next boot up the system, the card will register itself on the top left corner of the screen before POST- a sign of a working card, then go into POST & eventually the boot up process into the OS. If you see any colour differences or the screen one particular colour (e.g pink when you are using a DVI converter, just turn off your PC and re-plug in your cable, it’s just a connection problem. Once ok, give yourself a pat on the back, you are all done!

hi, your site is very informative. came across this in search of where to buy arctic silver thermal compound here in singapore. i have a problem with my xbox 360 GPU, any advice?
more power……
Hi Romel,
For arctic silver compound as well as any other brands of thermal based compounds, you can check out PC enthusiast and accessory stores in Sim Lim Square. It’s situated along Rochor Canal. You will be spoilt for choice there.
will check it out, many thanx…. again more power!
Hi Shaun
Sim Lim, where can buy heatsink for graphic card
cost range.
thank
Hi Darren, I think the stores from 3-4th floors sell quite a range of 3rd party GPU coolers. Few stores I have in mind will include Fuwell and Skylet (they have quite a big thermal take range). There are few smaller backlane specialist “modder” stores too, but didn’t quite remember their names. Think they stock quite a range of water cooled thermal blocks too if you are keen into liquid cool than traditional forced air cooling.
Other brands will include Vantec & Zalman (one I am personally using for my Ati HD3870). Prices should be in the range about $40 to $50. Generally the full copper heatsink ones will set you back much more.
Hi Shaun
thank u.tot of replacing as out of warranty.
as received no signal from monitor.
thank again
I know that this isnt the right blog to ask my question but I hope you’ll help me…I have my TSA test and interview in a week. :-/ I am clueless and completely scared. All the sample videos I’ve seen have been a little helpful but I still have the following questions-:
1) Are you supposed to know quotes from economists, their theories etc ???(I’m applying 4 economics)
2) How will they ask me my theoretical material-by showing me an article/ directly asking me questions or in an underhand/ convoluted way???
3) What should I address the woman who’s interviewing me..Mrs./Dr./ or Ma’am?
I would be grateful if you could help.