
I kit model as a personal hobby, I particularly like assembling mechas and vehicles. Besides getting down & dirty, the past time involves the combination of ones patience, skill, tool handling, let be painting or adding details to produce one-off models unique to a modeler’s wants and imagination.
Kit Modeling tutorial article table of contents
- Intro, cutting & sanding pieces
- Priming & painting
- Detailing
- Assembling & decalling
- Posing & finishing
Kit modeling, the basics
There is always a kick to building models, that is why most modelers simply can do upon completing one is to admire their creations for a while, just to pad off to the store and start off another kit once they are done.
One of the most rewarding experiences this hobby gives is not only the satisfaction you get upon final completion, but the value appreciation of the model kit over time, particular rare & collectible models. There a large collector’s market & auctions for such model kits & they can really fetch good rates for their creators. Otherwise, for most casual modelers like me, modeling as a general hobby is to past the time.
This tutorial is written primarily to serve as a guide for anyone who wishes to get on the kit-modelling bandwagon. Do note that there is no “fixed steps” to modelling & this tutorial reflects my own style & practise. Different modellers have different procedures themselves, but are very much similar in one or anyway eventually.
The test subject
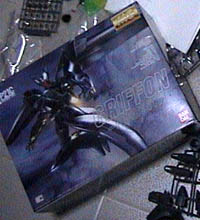
The model I will be using is a Mecha from one of my favorite 80s anime & manga series of mine- Patlabor. It’s a Japan made Bandai MG (Master Grade) plastic injected model type J-9 Griffon combat prototype labor. Like most master grade models it spots additional fixtures like a detailed cockpit & an eye for details usually not seen off the standard off-the-shelves 1/60 sized models.
This is a general claim though & the end result usually depends on the modeler’s skills & experience in the field as well. There is also the added flexibility to assemble the model in various configurations as well (in this case with cockpit open, pilot or jet accessories).
Some Terminology
I may use these terms in and out throughout the tutorial, to prevent confusion & maintain consistency:
Parts plate: The injected plastic plate holding the various pieces by thin arms (injected molded frame part holder)Rubber Plate: Similar to part plate, but for rubber parts
General inventory & Tools of trade
The basic modeler’s kit should have the following tools:
- Scissors
- Modeller’s knife
- Paintbrushes (Generally L/M/S Sizes)
– 10/32″ Surface painting
– 5/32″ Minor Detail, Moderate small pieces
– 1/32″ Fine Panel Outlining - Detailing Markers (Gundam Markers or Mitsubishi Pencil Uni Fine all
marking Paint Markers) - Sandpaper, Fine
- Mini Fine/Spectacle screwdriver set (Varying Diameters)
- Small pair of Pilers
- Paint Pattelle
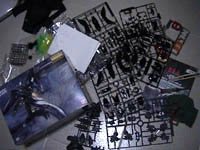
Other items include the acrylic paint with colours based off the model sheet’s recommendations, you can also of course, mix paint to achieve a varying array of colours to offset from recommended colours if may. A compressor driven airbrush is a nice-to-have luxury item, which is very good for the ease of detailing & painting surfaces.
Organising & preparing the pieces
It can be quite difficult to track cut pieces after you’ve separated them. Furthermore with MG models spotting over 5-8 different parts plate, it’s a good habit to organise your parts using what else but the packaging box itself! Using separators, place them inside their own individual compartments. This too
Cutting the pieces
One of the first steps in kit modeling & separating pieces from the the plastic injected molded frame part holder.
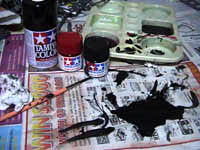
Take caution when handling the modeler’s knife, modeling paint & cement could be toxic & avoid contact with wounds if may.
Breaking off the pieces
Its a good habit to first use a pair of Scissors to cut the parts off the parts plate, giving some allowance & leaving about 1-2mm of the plastic connector (spure) studs still attached to the piece. Avoid cutting too close to the part as due to the shearing nature of the scissors, you might actually remove some plastic material off the needed part itself., which will require additional cement/putty filling & drying of holes which will take a considerable amount of additional time. This might also affect eventual surface finish if not smoothed evenly.
Finally, using the modeler’s knife, cut of cleanly, the plastic studs sticking out of the part itself. A smooth finish is essential especially at points where 2 pieces mesh/connects together, thus ensuring a tight seamless fit without any gaps.
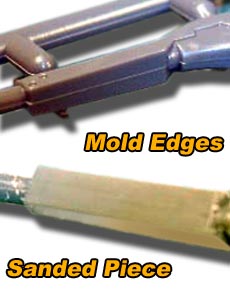
Present in almost all model kits except vinyl. Plastic is no exception, this is a manufacturing “defect” which is necessitated by the design of the mold or the way it can be economically molded at the factory. It is usually nightmare having to rid off off every piece, otherwise parts won’t fit or mesh. To remove these lines, using a modeling knife, simply scrape at the mold lines till they are flushed with the desired surface. Then use a sandpaper to smooth out the eventual part.Sanding
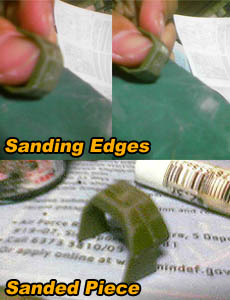
Finishing won’t be as good after the primary part removal & stud cutting, therefore the much needed step to sand your parts. Using fine grain sand paper (plastic/metal type is generally acceptable).
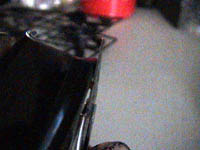
As the J-9 Griffon is mostly black, I will be illustrating this on the right image I took when sanding another one of my other plastic models with an olive-green colour to show the discolouration & eventual sanded piece.
Do not worry if your part appears whitened or scratched after the sanding process as it will be covered by paint or a finish later anyway. Cheaper models will usually have the “whittening effect” with the sand paper grains sticking on the part itself, this is also dependent on the type of plastic used for molding. MG models will have lesser of this “smearing effect”.
All defects however and thankfully, can be removed by just simply dusting them off before priming & painting, which I will be covering on the following page.
Article table of contents
- Intro, cutting & sanding pieces
- Priming & painting
- Detailing
- Assembling & decalling
- Posing & finishing
