
- Intro, cutting & sanding pieces
- Priming & painting
- Detailing
- Assembling & decalling
- Posing & finishing
Posing & Finishing
This last page of the tutorial very much covers the remaining steps for your model, such as final touch-ups, finishing & displaying your finished master piece.
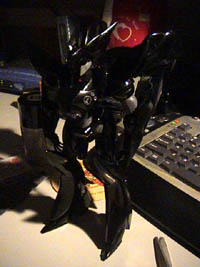
Finishing Touches
After assembling all the pieces together, if needed, do some light sanding to remove excess glue and paint which might harden & accumulate on joining parts. This is also when your do the final “cosmetic touch ups” using a small flat brush to make small daps of paint.
Locking in the paint
If you intend to display an automobile kit or a mecha kit in show room condition. You will definitely need to apply a finishing coat of clear lacquer. There are gross and matte finishes for both so it can go with whatever look you are after.
Many often overlook this step given the already locking & finishing properties the acrylic paint already gives. The true result of the the sealing lacquer only shines few years down the road where your model starts to ages & dull (unless you are deliberately modeling a worn, weathered setting). Also, though not as commonly available, there are matte variations of sealing lacquers, also used for sealing in flat non-glossy paintwork and not ruin your weathering paintwork at all, just always remember to let the base coats dry completely before applying the coat. However, irregardless of what kind of lacquer you apply, there will still usually be a hint of reflective layering on your model. If you cannot allow that, I say, just leave your model with the paint layer on and that all.
Applying Finishing lacquer
Apply in uninterrupted continuous sweeping motion about 20-40cm away from the model itself. Avoid repetitive double coating over wet layers.
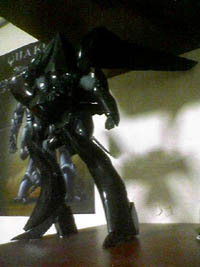
Posing
If you’ve already decided on your posing stances for your model. You can skip this portion.
For long term display, it is generally advisable to place your model in a neutral relaxed state. Unless you deliberately cement tight all your model joints permanently to lock it in a fixed position (e.g. usually applied for flight or a fight scene).
It’s all based on the principle of stresses and equilibrium. Let be, joints or even screw tightened joints will slack & overtime your will tend to lose it posture & return to its neutral position. This is mainly applicable to mechas with humanoid articulated figures.
In such cases, you can apply stands or “joint stoppers” to prop up parts like arms/wings if need be so you can change the pose if need be, contrary to permanent cementing. A simple clear acrylic rod mounted to a base will be a good prop to use for lifting a Gundam’s wings for example or create a space or fight scene where you need the subjects suspended in the air.
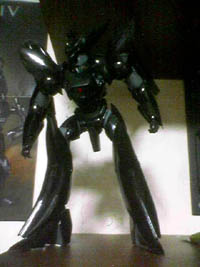
Placement
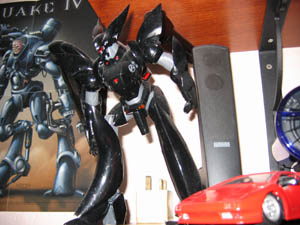
General tips on placing your model, they will usually go well in a display case whether its open air/closed type or simply propped on a shelf. It is advisable to place models away from direct sunlight and in low humidity areas so as not to accelerate paint fading or cracking. I ever had a heavily decalled rally car model which I placed on an open air shelf for more than 5 years, the plastic colours started whitening and the decals all turning brown, so it pays to place them in a sealed and cool environment.
Model Containment
It’s a good habit to place models in a contained display case so as dust will not accumulate, thus avoiding the need of regular cleaning which can damage the model overtime.
Moreover, accumulated dust are static in dry environments, causing them to clump & stick to your model’s surface in lumps. In such situations, even a damp wipe cannot remove. You will have to use a modeler’s knife to scrape it off which will definitely require patching up thereafter.
You can purchase one from your local hobby shop in various sizes, or let be an aquarium shop selling fish tanks.
Bases
Flat wooden bases generally give an overall exquisite finish to your model. They are relatively easy to make & lacquer yourself using simple wood cutting tools & finishing. You can mount your model on this using epoxy or regular cement. Otherwise you can attach support stand to hold or suspend your model (also used for Gundam flight scenes as well). Like containment case, you can go look up for them in your local hobby or even trophy shops which sells finished plaques. They come in various sizes & shapes with square, rectangular, circular being the most common, custom contorted, segmented shapes are also available but rare and you are better off making such custom bases yourself.
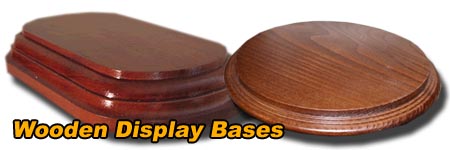
Wooden lacquered plaque/bases, you can buy one or make one yourself.
Finishing & Summing up
Thats all folks, well that very much covers my tutorial for kit-modeling. Way start off from opening the box, detailing to the eventual finishing for the eventual proud display of your masterpiece. Whether you are a professional or budding amateur, be rest assured in the modeling world, there are no limits to what you can do, only your imagination. Enjoy!
- Intro, cutting & sanding pieces
- Priming & painting
- Detailing
- Assembling & decalling
- Posing & finishing
