
- Intro, cutting & sanding pieces
- Priming & painting
- Detailing
- Assembling & decalling
- Posing & finishing
The School of Thoughts
While most amateur modelers simply just smack together all pieces & paint later, this is not the recommended way as you eventually have to disassemble the model again to paint those hard to reach places. If you plan to model, you must model your plan. In the general school of thought here are 2 styles of painting:
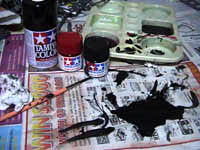
1) Paint while to parts are still attached to the parts plate, i..e paint before doing the steps mentioned on the previous page (usually for spray painting, etc)
2) Paint after all the parts are removed & sanded.
Personally, I prefer the 2nd approach. Considering that I am not blessed with expensive spray guns & compressors, not to mention the costly paints which comes with it. The 1st style is definitely faster for mass painting & allows you to apply a more uniform base coat. Followed by the cutting process, a simple sanding & paint touch up & the part is ready.
Moreover, the chances of part loss is lower as you do not need to handle each part to paint one by one. This however, do not hold if your model requires unique colours for each part contrary to one colour throughout, this is where style 2 shines.
For the casual modeler using the 2nd school of thought, I recommend using bottled acrylic paints you can find in your local hobby stores or shopping center toy departments. They usually won’t cost more than $4 per bottle. For painting larger big surfaces I will recommend acrylic spray paints (usually $7/can). Use spray paints sparingly or when there is a need to paint many pieces of large flat surfaces at ago, you do not have much control over the delivery of the paint as compared to an airbrush.
With sprays aside, now I will touch on the most basic tool for painting- brushes.
Brushes
Expanding on the list of required brushes for painting, they usually come in measures on inches, usually I will recommend a mix of thick flat ones for painting large parts with ease to the more frequently used medium width, to a collection of fine brushes for detailing and panel lines.

As illustrated above:
– 5-8/32″ Small-medium surfaces, minor detail, moderate small pieces
– 1-2/32″ Fine panel outlining, screws, lines & misc detailing
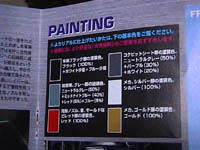
The Colour Key
Included in the main assembly manual is usually a specifying all the required colours used for the model on the default scale. Do note that not all paint manufactures make all types of colours & most of the time you have to mix colours to achieve custom colours, usually defined in the colour scale at given percentages (e.g 30% white/silver, 20% blue on top of black for a shade of cool blue metal). The basic universal colours are usually black, white, gunmetal & silver for Mechas.
Do note too that each offered colour usually comes in glossy & flat (matte) variations. Glossy paints are usually for finishing, automobiles where the desired smooth shine is required. Flat paint are usually for machine parts, miltary machines where a more “worn out look” is required. Flat spray gun paints are very good for producing burnt/stains marks very well too. You can mimic that with the given spray paint as well, but not to a controllable degree.
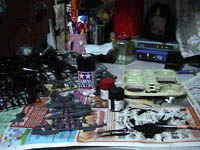
Workplace
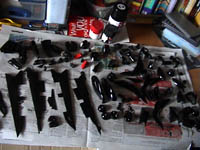
Painting can get really messy at times. If you do not have a dedicated workspace for modeling, its best to have a big flat surface or desk preferably with the usual newspaper not only to prevent work table staining, but a good absorber of spills, etc. Little items like a palette, brush water cup & dampener as essential as well. Have another open area for you to organize & place your painted parts so as not to misplace them & helping in part organization as well. This beats the worst thing – encountering missing parts during the assembly phase.
Priming
Priming ensures better adhesion of paint to the model surface, increases paint durability, and provides additional protection for the material being painted.
Also considering the painted surfaces being plastic, paint do not stick as well to such smooth, non-porous surface unlike paper or wood. Thus using more paint to even out the finish, which is not economical because it’s more expensive than primer.
Therefore, this required step as it adds a thin layer between the paint & actual plastic surface so if the need be to remove paint using thinner, etc this can minimise damage to the plastic surface though mildly but considerable extent.
In addition to sealing the surfaces, good primers will also cover different textures like the difference between your rough sanded plastic. This is critical if you’re using higher-gloss paints which tend to show those differences and imperfections more than flat paints.
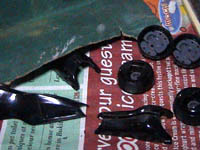
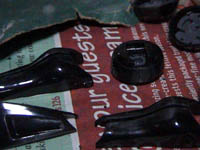
Moreover, another benefit of using a primer is that it provides the finish paint a better bonding surface so it sticks to the base material much better.
Apply primer only to surfaces to be painted & avoid applying any (together with paint) on the insertion pins where the parts mesh together (to ensure part fit). However, with this in mind, do bleed primer edges by overlapping primer edges over the desired actual painting borders. Apply primer thinly & evenly & give about 5-6 hours to dry completely.
Base paint coat
Acrylic paint can usually be applied direct on top the primed plastic without mixing with water. But for base coats, a 70% paint 30% water ratio is safe to quickly & effectively apply the base coast without much loss in quality.
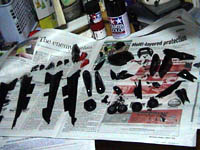
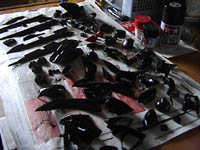
Leave the base coat to dry for about half a day in an indoor environment avoiding direct sunlight or your paint will end up appearing cracked or chipped when dried faster than their intend drying time (aka ‘superdried’).
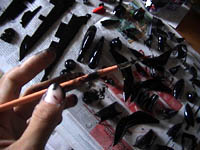
Secondary paint coat (optional)
When done, inspect the pieces for surface finish. This step is mainly to make the surface flat & even, ready for the finishing coat.
You can skip this step if the surface is already of desired finish. Otherwise, using a brush, overcoat the affected area with strokes overlapping the entire area, this is so to prevent obvious “patching” visible when only fixing a specific spot. When dried the paint will eventually blend together with the existing base coat.
Finishing (fixing) paint coat
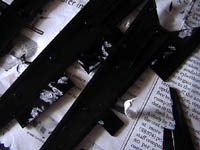
I usually use 100% paint for this step for the nice locking thick coat without water, thus achieving a consistent uniform coat for a spectacular finish. Take special attention to this especially when painting the the largest external & visible surfaces of your model.
Points of Note
When leaving out to dry on newspaper, avoid placing large flat surfaces on the paper directly as upon drying the newspaper will actual stick to the part surface, leaving you with an additional tough job to clear out the grime & retouch-up/paint the surface. If need be , prop up the part on the newspaper using support stands savaged from the part plate arms.
General brush strokes involves a single uninterrupted stroke on one surface from one end to another, just like how a bubble jet print head moves, one end to another. This is also to prevents paint gaps in between surfaces. As usual leave for half a day for the finish coat to dry.
Painting Summary
As it goes, in summary for this particular step:
- Priming
- Base paint coat
- Secondary paint coat (optional)
- Finishing paint coat
Next I will cover on detailing over your newly painted surface.
- Intro, cutting & sanding pieces
- Priming & painting
- Detailing
- Assembling & decalling
- Posing & finishing

I love this post. Its such a nice post. Thanks for the post.
Nice article. Really helpful for the readers.
I have read so many articles or reviews concerning the blogger
lovers except this piece of writing is really a fastidious piece of writing, keep it up.