
I generally clay model as an art-based hobby of mine. Clay modeling is another form of expression of art. It allows artists to portray a subject or detail in true 3 dimensional form, contrary to drawing on 2 dimensional media such as paper or canvas. It allows an object to take form with true depth and detail, achievable with the added dimension. It also test and artist’s detailing skills to produce one-off unique clay figures, fueled by arty imagination & desire.
- Planning and structure (Concept & frame building)
- Medium (Clay) application, setting & surface detailing
- Painting & finishing
Figure clay modeling, the basics
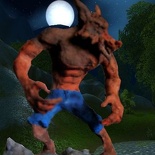
I collect action figures, especially certain from SPAWN series, especially the mcfarlane monsters collection. But there are always limitations to what the manufacturers release and have on catalog, its always abit here & there but not totally what I want. Though not as flexible as articulated action figures, clay modeling allows artists to create figurines or models based off their very own custom specifications and with greater ease and lower costs as well. For this tutorial I am modelling a brown timber – werewolf of the night
Planning phase
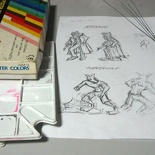
A very critical preliminary step of clay modeling. Its generally advisable to pen or sketch down any conceptual drawings you have in mind immediately on paper, allowing you to redefine the look, posture, pose of the model & constantly constructively add details to your figure. Try to include some projection views on your sketch as it not only serves as a model making guide, but allows your to spot and circle out certain details or possible problems which could arise, all before the building process.
Materials required
When satisfied with your concept, head down to your local bookshop, DIY store or art supplies store to purchase the following.
Material List
For a clay sculpture at about 20cm tall, you will need:
- 2 packs of white clay (These ones originate from Japan usually in 15x6cm blocks)
- 1 roll of masking tape
- 1 full colour set of poster colours + pallet
- At least 3 sized paint brushes (Fine/Med/Large)
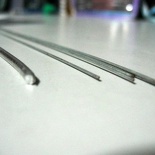
- 30cm of 2-3mm diameter solid steel wire, cut into desire lengths
- 50cm of fine (diameter 1mm) solid steel wire
- Detailing knife or fine/mini screwdriver
- Wire cutter and pliers
Most of the time, you should be able to get hold of everything at a book/stationary shop and shouldn’t cost more than $15. Unless if you intend to use high grade brown clay, you might need to give a specialised art store to purchase these high grade clay, moreover, supplies there are comparative more expensive than your local bookstore.
Brushes
Generally I use 3 basic brushes, I call the fine (1-2/32″), medium (6-8/32″) and the large ones (12/32″), as illustrated below.

Bits and pieces
Standard items for poster colour painting includes very standard items like a brush wash & some paper towel/tissue wipes for touching up the model. Alternative to the steel/aluminum wires of varying thickness are wooden ice-cream sticks or satay sticks with both sharp ends broken off and masking taped.
Otherwise, you can savage the wires from old mesh baskets, etc at home). Also, do take note that clay itself is brittle and not load bearing when dry, it’s more or less a compulsory step to include a central skeleton for your model and for the clay to stick on.
Creating the skeleton
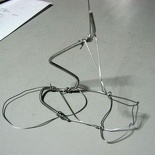
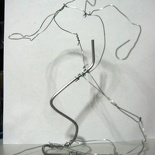
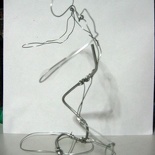
I usually model the base together with the figure itself, as it beats getting another wooden base or display to stick your figure on. Moreover, it also prevents stresses from building up at the feet area (when you secure it to another foreign surface), which can cause the clay to fake or break when hardened or over time. Using the thicker 2mm diameter wire, bend a circle or a U so that it sits firmly on a flat surface without rocking. Then extend the remainding end upwards where the legs are, bending to follow the internal contours of the feet, ankle, knee and eventually the hips, clay will be patched around it thereafter.
Wire for thought
It is advisable to use these thicker stronger wires starting at the base, the legs, then to the mid torso area. From there, use the thinner 1mm diameter wire to loop the frame for the upper body, the head and the arms. It is not recommended to use the heavier thicker wire at any upper extremities so that the model’s skeleton’s center of gravity will be kept low and stable, this though can be fixed with clay weighing, but a sound stable skeleton is a good promising start to begin with for any budding modeler.
However, if you require a heavy upper body (e.g your model to weld an object like a weapon, object, etc). Create a weight bearing frame independent of the model’s main skeleton, starting from the base (with the same bended flat base), making your way through the body and eventual to the upper load supporting point. When done you will have 2 skeletons meshed together (if you were to separate them, both stand independently).
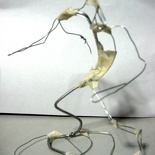
When done, use masking tape to bind and secure any lose ends of metal wires and also to serve as a porous catching point for the clay to stick on. Reinforce sparingly with masking tape the base and primary support point, the pelvis area of your figure.
For detailed items like accessories, cloaks clothing waves or extruding parts, (e.g the ears in the werewolf), you can choose to make their wire frame separately and attach them later with clay (which I will be doing later for the hands). Otherwise, cut bend small thin wire and tape them to the main frame itself. Now you are ready to apply the clay.
- Planning and structure (Concept & frame building)
- Medium (Clay) application, setting & surface detailing
- Painting & finishing

You have wrapped up the points every beginner needs in starting figure clay sculpting. Well done! 😉