- First impressions, Installing RAM & the addon cards
- About the heatsink. installing the CPU
- Installing CD-ROM & Harddrive. Wrapping & booting up
Installing CD media drives and harddrive
Whether you intend to use your HTPC as a universal player for DVD or Blue-ray movies, you can always purchase a Blu-ray writer or combo drive for use in the PC as an alternative to a dedicated Blu-ray player. Alternatively, you might want to invest in a large internal harddisk with a capacity of at least 1TB which you can use to store and playback movies or record shows off the TV as well.
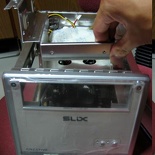
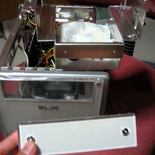
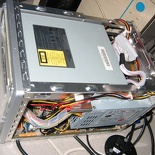
Now onto one of the simpler steps of the tutorial, installing the drives & stuffs. The drive cage is where all the system’s internal & external media drives are secured to (Fig13.0). A small case such as the SliX do not have the luxury of multi-bay slots for multiple harddisks or drives, spotting only a 5.25″ and 3.5″ bay respectively. After unscrewing the locking screws, gently pry out the 5.25″ drive panel where your CD-ROM would be located as shown above (Fig 13.1).
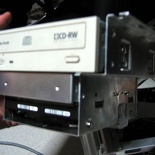
Using the provided screws, secure the required drive(s) onto the cage/holder (Fig 14.0). For this example, I have an Iomega 40x12x40 Combo drive & a 80GB IBM Deskstar harddrive (HD) to install. Since this is an IDE drive, be sure to set the jumpers for the respective drives so as not to have any config conflicts later on POST.
These days motherboards still spot IDE P-ATA-100/133connectors, so you are still in luck if you wish to connect that old CD-drive or harddisk. This SiS motherboard have two IDE ports, therefore I can choose either to connect both devices together using one IDE port (HD as primary master, CD-ROM as primary slave) or the 2 IDE port option (HD as primary master, CD-ROM as secondary master) using 2 IDE cables. Either way require the harddrive to be set at “master” jumper setting but the CD-ROM at “slave” for the 1st option & “master” for the 2nd. With that, lower the cage into the casing & secure it in place.
If you are using SATA drives, simply just connect the SATA cable onto the back of the hard disk and into any of the SATA connectors on the motherboard followed by the molex power plug, the same is for the DVD-drive as well. Each device will have 2 cables running from it- a data and power cable from your PSU.
Wire management, closing & booting up
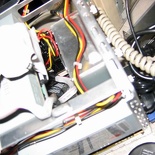
Since we are on the install of the internal components, cabling is inevitable and there comes the problem of messy cabling. Due to the small size of the casing wire management is essential. Excess IDE or SATA cables should be placed in a way no obstructing the ventilation fans. Therefore as far as possible make use of the parallel rails (Fig 15.0) at the side of the casing to act as a runner for power & IDE cables.
Though this is not much of an issue for the thinner SATA cables, for PATA IDE cables, if necessary purchase thin/tied IDE cables instead of the wide ribbon one. Alternatively you can also coil up thick ribbon cables. The general rule is: keep the wires on the outer sides of the interior & leave the central interior as open as possible.
Operating system
Once done, close the other cover, plug in the necessary components & peripheral & booth up, Upon a successful post, go ahead to create format partitions using fdisk or so & install the system’s OS thereafter. These days installation of operating systems are very easy and straightforward, so I won’t be touching much on that. Just follow the basic steps: boot from CD/DVD, format your harddisk, install the OS and configure.
For choices of operating systems, I will recommend Windows for a media PC OS, as it’s the most feature packed out of the box. The details come into what variant of the OS you wish to get- without a doubt, the media PC editions will suit just fine. For Windows XP, we have the Media Center Edition, for windows Vista, I will recommend Home Premium to Ultimate as they have media PC functions built right into the OS.
Additional HTPC software
Of course, another comparative edge a HTPC has is the difference of software it has under the boot, which give it it’s unique functionality, here are some recommended software you can use for your HTPC.
- Mediaportal (free)
- Yahoo! Go TV (free)
- Snapstream Beyond TV– Software to record video
- Nero LiquidTV– All in one software with Tivo subscription
- PowerCinema 6– Watch and record digital HDTV
Video and Audio Codecs
A HTPC is of course built to play media and what is more frustrating of not able to play any desired file type you want? With mpg, avi files (including their sub encoding formats such a DivX and Xvid) to quicktime and realmedia, that is alot of players to deal with! A solution is to install an all-in-one codec pack, which allows you to play all types of video or audio files on a single player, say windows media player. There are many different types of codec packs around the internet which you can search for, a few I can recommend will be K-lite and fddshow.
Necessary Home Theater PC accessories
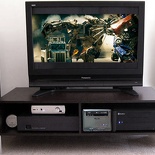
Now with your basic box in place, it’s time to furnish your new addition to the living room with distinguishing features and gadgets which makes it a distinct home theater device. Recapping, the basic need will definitely be a way to put audio and visual to your existing Hi-fi setup. So the following are more or less basic necessities.
Converting an existing old PC
There is not always a requirement to always build a HTPC from scratch, you can always convert an existing old PC into one, all it takes are these few distinguish features in a nutshell, with the main points to note:
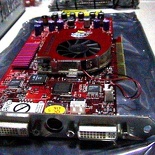
First off, the video card, unless you are using a LCD TV which accepts VGA port output. Consider getting a graphics card which allows you to out put signals to a TV or even better a projector if permits.
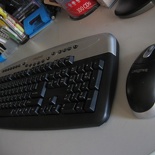
Dunk your old keyboard and mouse, upgrade your input with wireless devices- You can complement your system with with a wireless desktop provides freedom of controlling the computer from a distance & not tied down by wires at the same time, providing easy stowage, like under a coffee table of something. It is possible to remote control your computer with a commander.
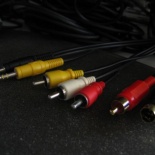
Furthermore, you can consider connecting audio to your TV, or you can always have an additional audio speaker setup. Otherwise if you have an existing home theater surround speaker set up, make use of you soundcard’s full potential by plugging the output to a home theater amplifier & experiencing DVDs or surround gaming from your soundcard. All these video & audio cables can be easily obtained locally from your friendly electronic or DIY stores
Having said that, generally for the ability for a HTPC to function effectively, you will need the following items:
- Ability to output to TV screens
- Able to output sound to your Hi-fi or amplifier
- Able to universally play any type of video or audio file
- Able to record/play time shift video (DVR)
- Able to quickly access media files without clutter
- Serve as a music repository which you can access to play
- Able to be remote controlled from your couch
Of course other nice to have features can be networking your PC so you can stream or play your music or videos anywhere in your home.
One of the magical features of a HTPC is it’s modularity which makes it some what future-proof. Need to play Blu-ray movies? upgrade your DVD drive to a Blu-ray player. Need FM radio on your PC. Install an analog/digital tuner with FM/AM radio then, the options are endless and the best thing is that you do not need to do a costly overhaul of your system every time you wish for an upgrade.
In conclusion, the small size of a HTPC makes it an ideal appliance for any living room. It adds PC multimedia entertainment to televisions, allowing you to chat, surf the net, watch movies or even play games on the big screen. The possibilities are endless.
- First impressions, Installing RAM & the addon cards
- About the heatsink. installing the CPU
- Installing CD-ROM & Harddrive. Wrapping & booting up

