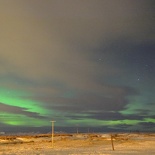
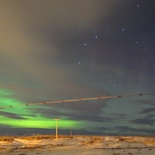
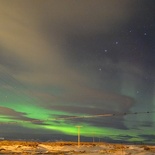
Iceland’s geographical location up in the northern hemisphere near the earth’s poles makes it a feasible place to catch the Northern lights. These natural occuring phenomon of beauty typically appear late at night (about midnight) in winter.
There are several factors which contribute to the formation of the Northern lights, with the most important being a colder (near sub-zero) temperature and the presence of strong solar ionization on the poles.
How the Northern Lights are formed
The northern lights are formed by the ionization of inert gases at very cold temperatures trapped in our upper atmosphere fueled by no other than our own Sun. As such, the best time to see the Northern lights will be known periods where the pole ionization is the highest, with the best chances being during winter timed along with periods of a solar flare, where our sun lets off approximately 10-yearly. Several meteorological services have a yearly prediction of solar flare activity when it reaches earth which you can use as a guide.
Cloud cover in Iceland
While the Northern lights are not uncommon in Iceland during winter, however, Iceland is known for their relatively high and unpredictable cloud cover. This makes viewing of the Northern lights more challenging in nightfall. This highly variable viewing condition is so given the relatively small island size of Iceland and also being completely surrounded by the warmer oceans at night.
The presence of sea breezes at night blowing oceanic clouds from the warmer oceans inland and obscuring the night skies can dramatically change the clear cloud conditions observed during the day. This often gives Northern light hunters much false hope into thinking that the clear day skies (land breeze) will remain cloud-free at night. This is contrary to say, more ideal inland locations less susceptible to sea breezes such as the mountains of Tromso Norway, which make inland locations more ideal to catch the northern lights.
Spotting the lights
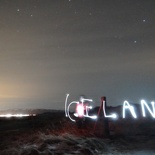
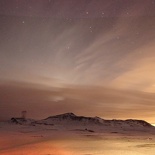
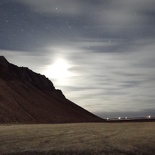
The northern lights are also much weaker in Iceland, though that can be speculated due to increasing global temperatures. But when the lights do appear visible in the night sky, they can be quite a visual treat, especially when photographed with the background of the white Icelandic tundra. The lights often appear as long streaks of faint green (ionized Nitrogen abundant in the air). However, sometimes the lights are so faint that it cannot be visibility seen by the naked eye, especially if your eyes are not adjusted to the darkness. This is where you will need a camera with a long shutter speed to identify and differentiate the Northern lights from say, an occasional patch of cloud.
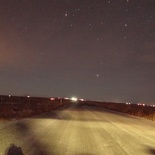
As such, you do need to have a very keen eye to spot them, as their faintness can often be mistaken for streaks of clouds. The best places to see the lights will be out of the city, where there is lesser light pollution. Icelandic roads at night are completely pitch-black with occasional street lights at junctions. This makes Northern light hunting along the roads very feasible, especially as the Icelandic roads have very little vehicular traffic after nightfall. Travelling in a group with passengers constantly looking out into the sky for the lights is a good start; where you can simply just pull over to the side of the road with your hazards on to take your shots away from the road without obstructing traffic.
To effectively capture the northern lights, you need a camera with manual functions and a sensor as large as possible. Usually you will be good with at least a semi-professional camera and beyond, offering an adjustable aperture and shutter speeds allowing up to at least 15 seconds of exposure time. And no your hand phone camera won’t make the cut. Other essential items to capture long exposure shots will include a stable tripod. I will personally recommend a gorilla pod or sort for more flexibility in mounting position, especially when shooting out in the field.
A smaller aperture number (larger aperture opening) lets more light into your sensor, allowing you to capture with shorter shutter durations. This results in sharper formations of the Northern lights. This is so as the lights are non-static and are always-moving/changing, sometimes with them disappearing as fast as they appear. Longer shutter exposures will give you larger, brighter streaks, with more distinct green hues, but appear more washed out due to their unpredictable movement.
You need to strike an optimal balance between image sharpness and blurriness. An exposure of 30 seconds at ISO 100-200 is usually the maximum exposure you should go without making the image too noisy. But also not risking a shot appearing too smeared as the lights constantly dances about in the night sky.
As said, luck is also a big factor in capturing the Northern lights in Iceland. I had heard stories of people who traveled thousands of kilometers to Iceland, only to be disappointed night after night not being able to see the lights on their trip. But if you do, I hope my tips here will provide you the best of possibilities in finding and capturing these scenes of natural beauty.

